Working with audits
Editor — processes & blanks
The Editor page (sidebar: Editor, URL: /editor) is the back-office for your audit catalogue. It is two things at once:
- A folder manager — create processes, recolour them, rename them, reorder them.
- A catalogue manager — add blank templates inside each process, move blanks between processes, lock them while you work, or delete them.
It does not edit the content of a single template — for sections, items, weights, roles and structure access, see the next page: Editor — blank content.
Editor — processes & blanks
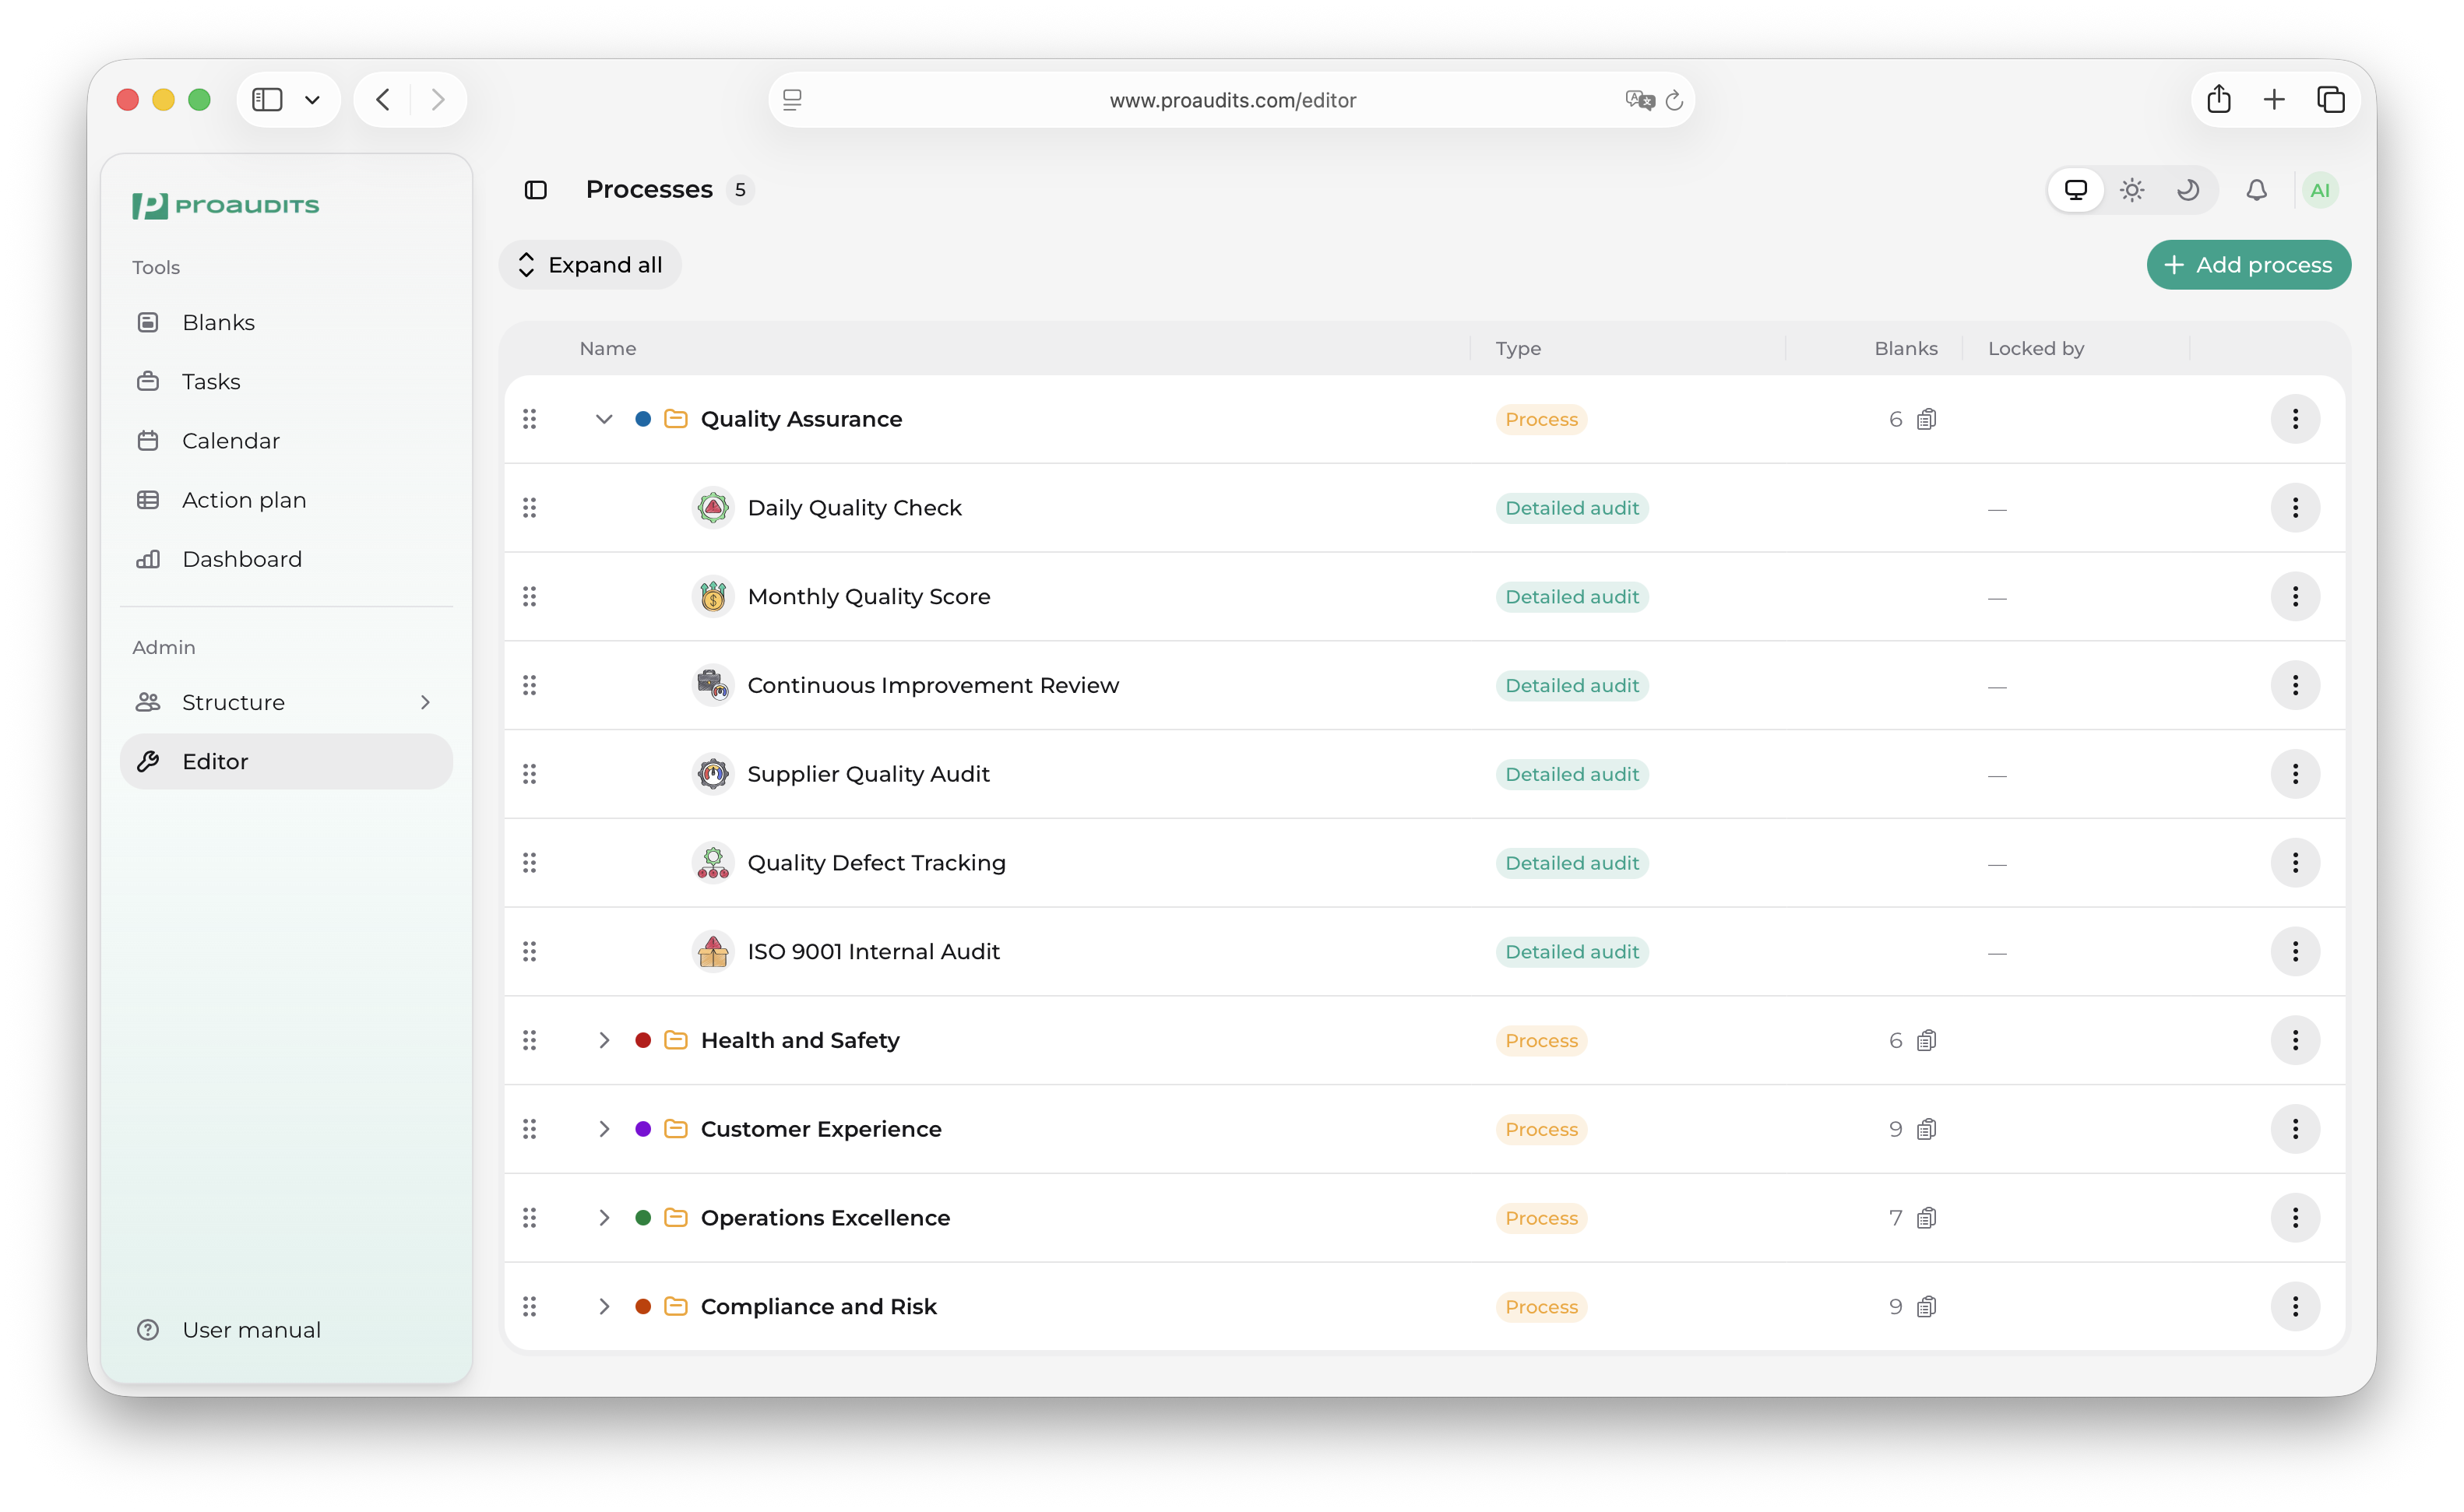
What you see on the page
A single screen with a header strip and a big data grid:
- Header strip:
- On the left, Expand all / Collapse all toggle (only visible when at least one process exists). A small Saving… spinner appears here when an action is in flight.
- On the right, the Add Process button (primary, teal).
- Empty state (when there are no processes yet) — a large card with the folder icon and a primary Add Process button.
- Data grid — rows are either processes (top-level, with a folder icon) or blanks (children, indented). Click any process row's chevron to expand or collapse it.
The five columns of the grid:
| Column | What it shows |
|---|---|
| Name | Process: colored dot + folder icon + name. Blank: indented template icon + name. |
| Type | Process: yellow "Process" chip. Blank: chip in the audit-type color — Detailed audit, One-page checklist, or Certification. |
| Blanks | Process: count of blanks inside, with a clipboard icon. Blank: empty. |
| Locked by | Process: empty. Blank: name of whoever locked the blank for editing, with a lock icon (yellow if it's you, red if someone else). |
| Actions | Three-dot menu — different actions for processes vs. blanks (see below). |
Working with processes
Create a process
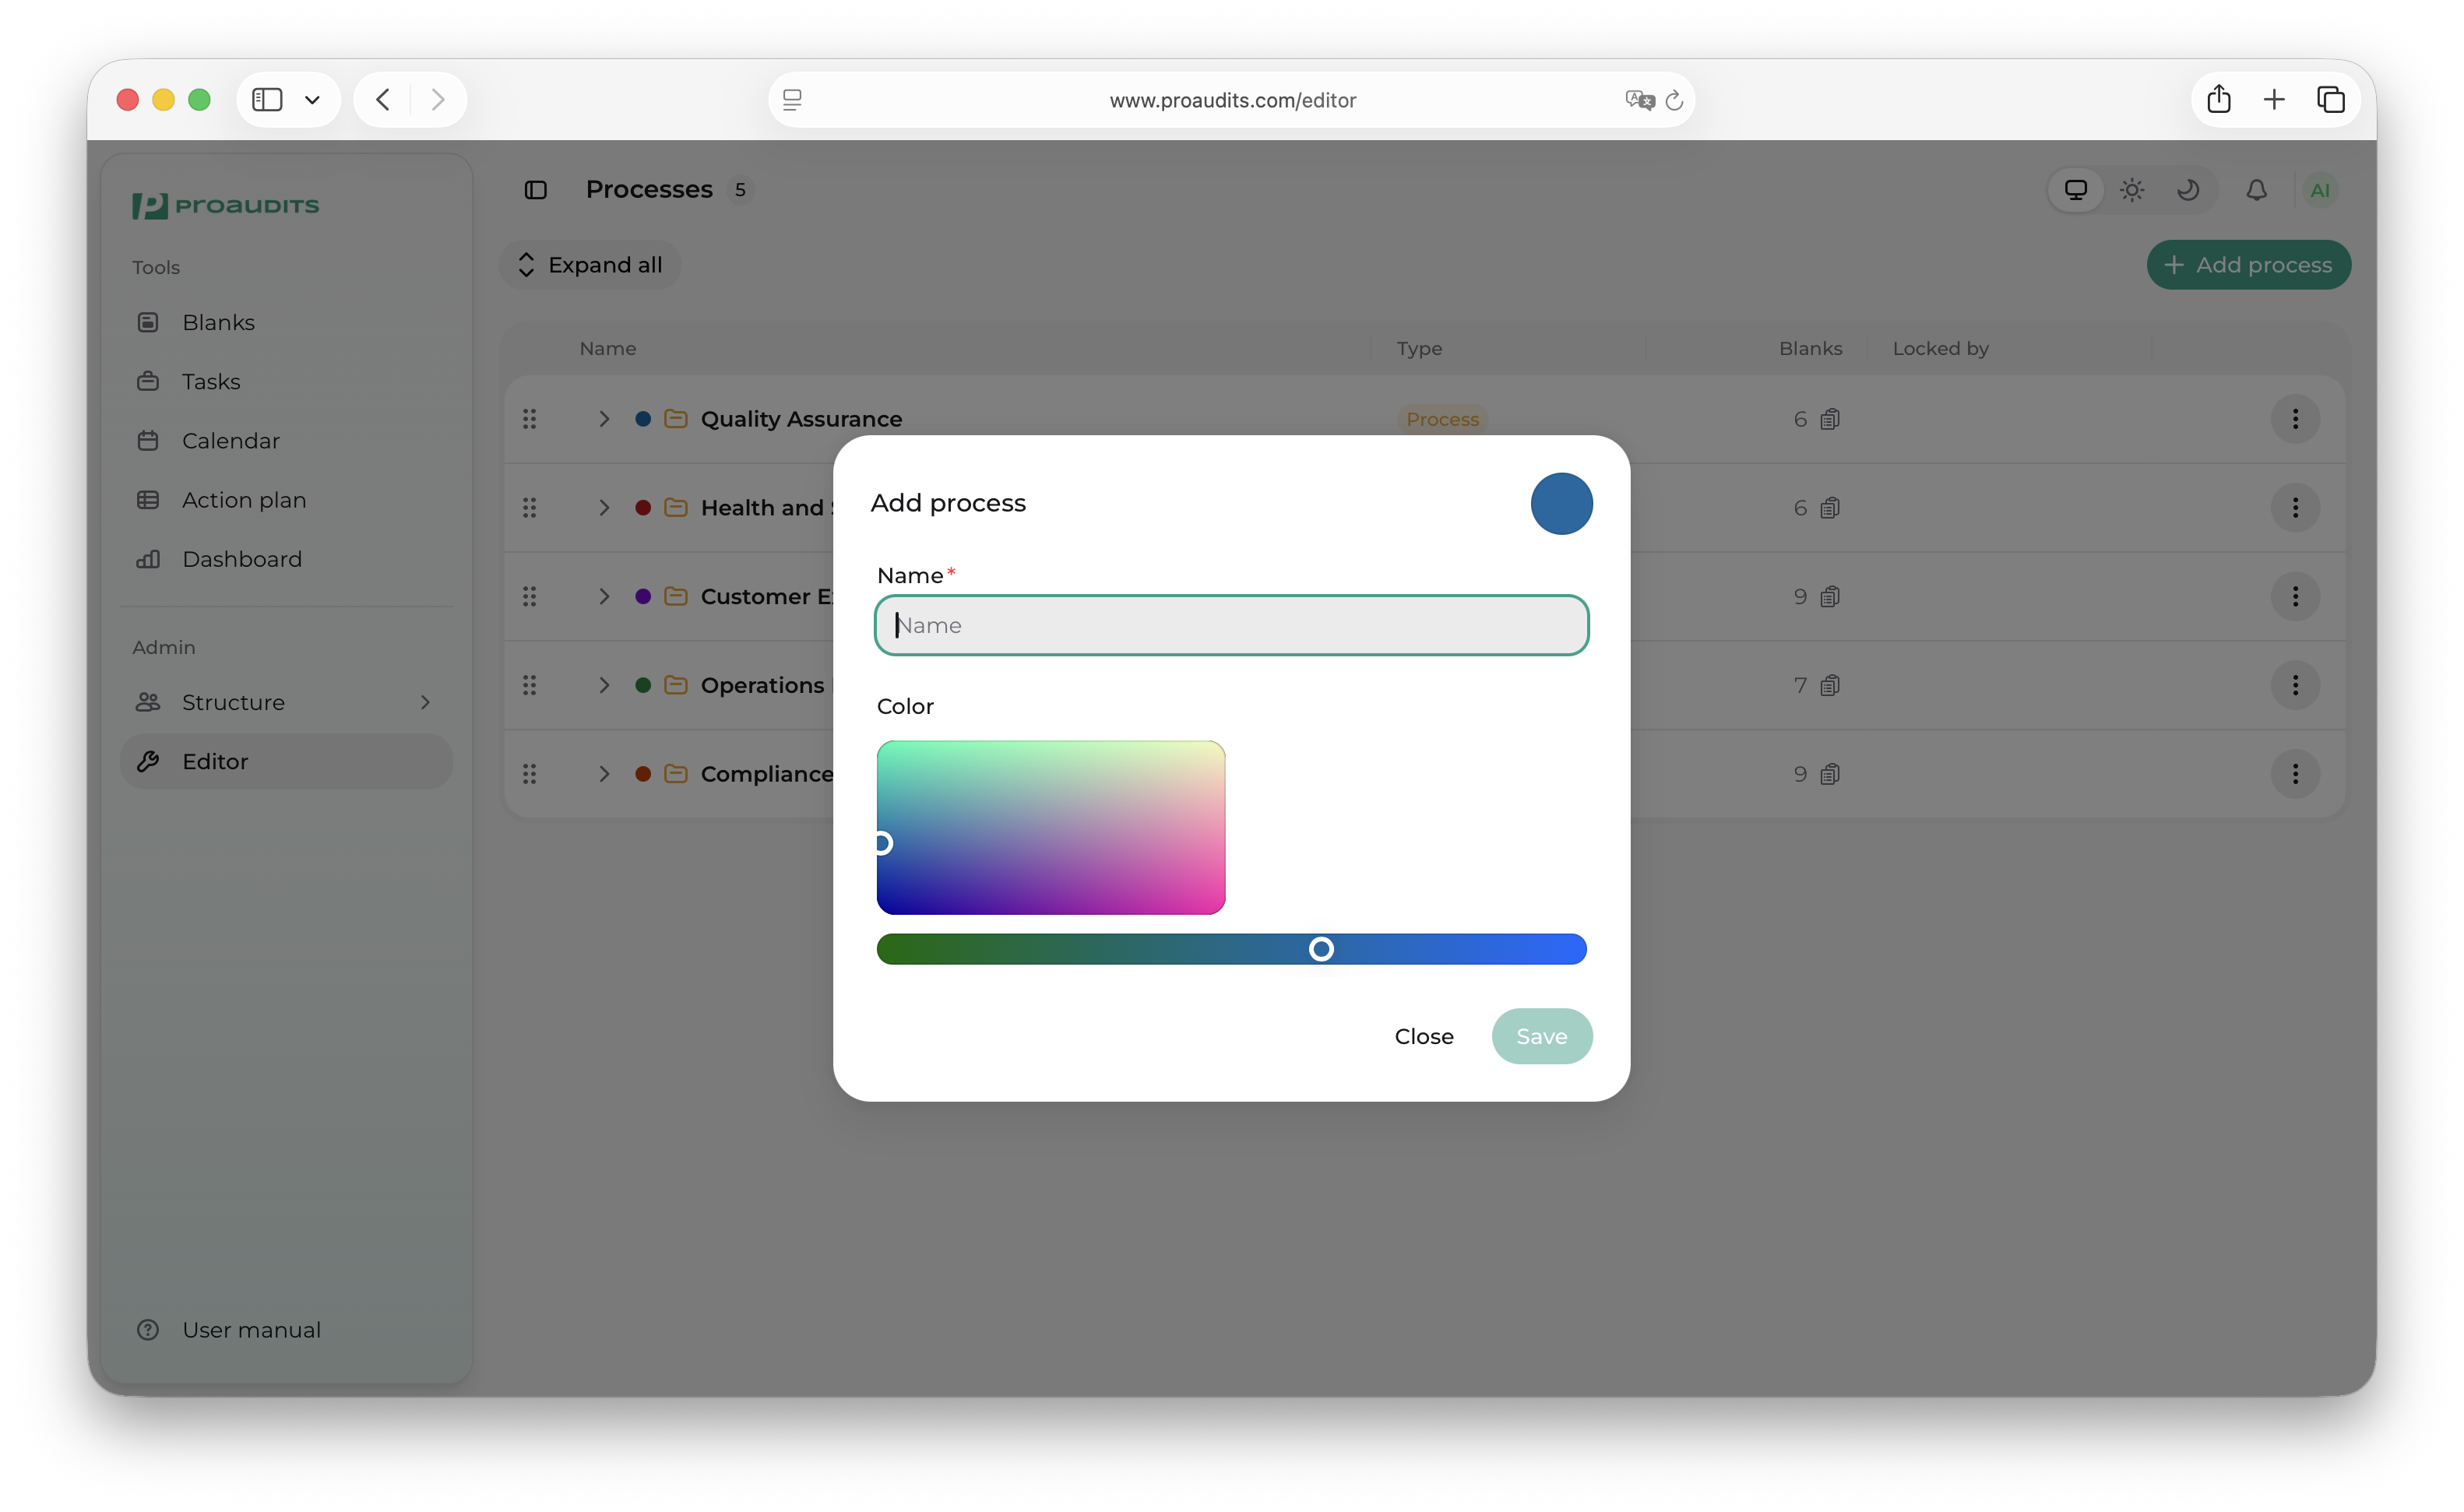
Click Add Process. A modal opens with three things:
- Name — free-form text, required.
- A 2-D color square — drag the dot to pick the red/green mix.
- A blue slider — set the blue channel separately.
ProAudits snaps the picked color to the nearest named brand tag color (red, sky, orange, yellow, green, lime, cyan, purple, pink). That snapping keeps the catalogue visually consistent — every process gets one of nine well-spaced colors. The current pick is previewed as a large swatch on the right of the modal.
Hit Save to create the process. The grid updates instantly. Close dismisses the modal without saving.
Add / edit process modal
Edit a process
Click the three-dot menu on a process row and pick Edit. The same modal opens, prefilled with the current name and color. Change either and Save — every blank in the process keeps its color in sync automatically.
Delete a process
Three-dot menu → Delete. A confirmation dialog appears (you have to confirm — there is no undo). When you confirm, the process and every blank in it disappear.
Delete cascades
Deleting a process also deletes every blank inside. If you want to keep the blanks, drag them into another process first — see Move a blank below.
Reorder processes
Grab the row by the drag handle and drop it before or after another process. The catalogue order in Blanks follows this order — keep the most-used processes at the top.
Working with blanks (inside a process)
Create a blank
Two ways:
- Process three-dot menu → Add Blank.
- Right-click anywhere on the process row → Add Blank (when supported by your browser).
A new blank row appears under the process with a default name. It is created with the Detailed audit type by default; you can change that and everything else from the per-blank editor — see Editor — blank content.
The parent process auto-expands so you can see the new row.
Edit a blank
Three-dot menu on the blank row → Edit Blank. This navigates you to /editor/template?templateId=… — the dedicated blank content editor page where you set up sections, items, roles, structure access, routines, and so on.
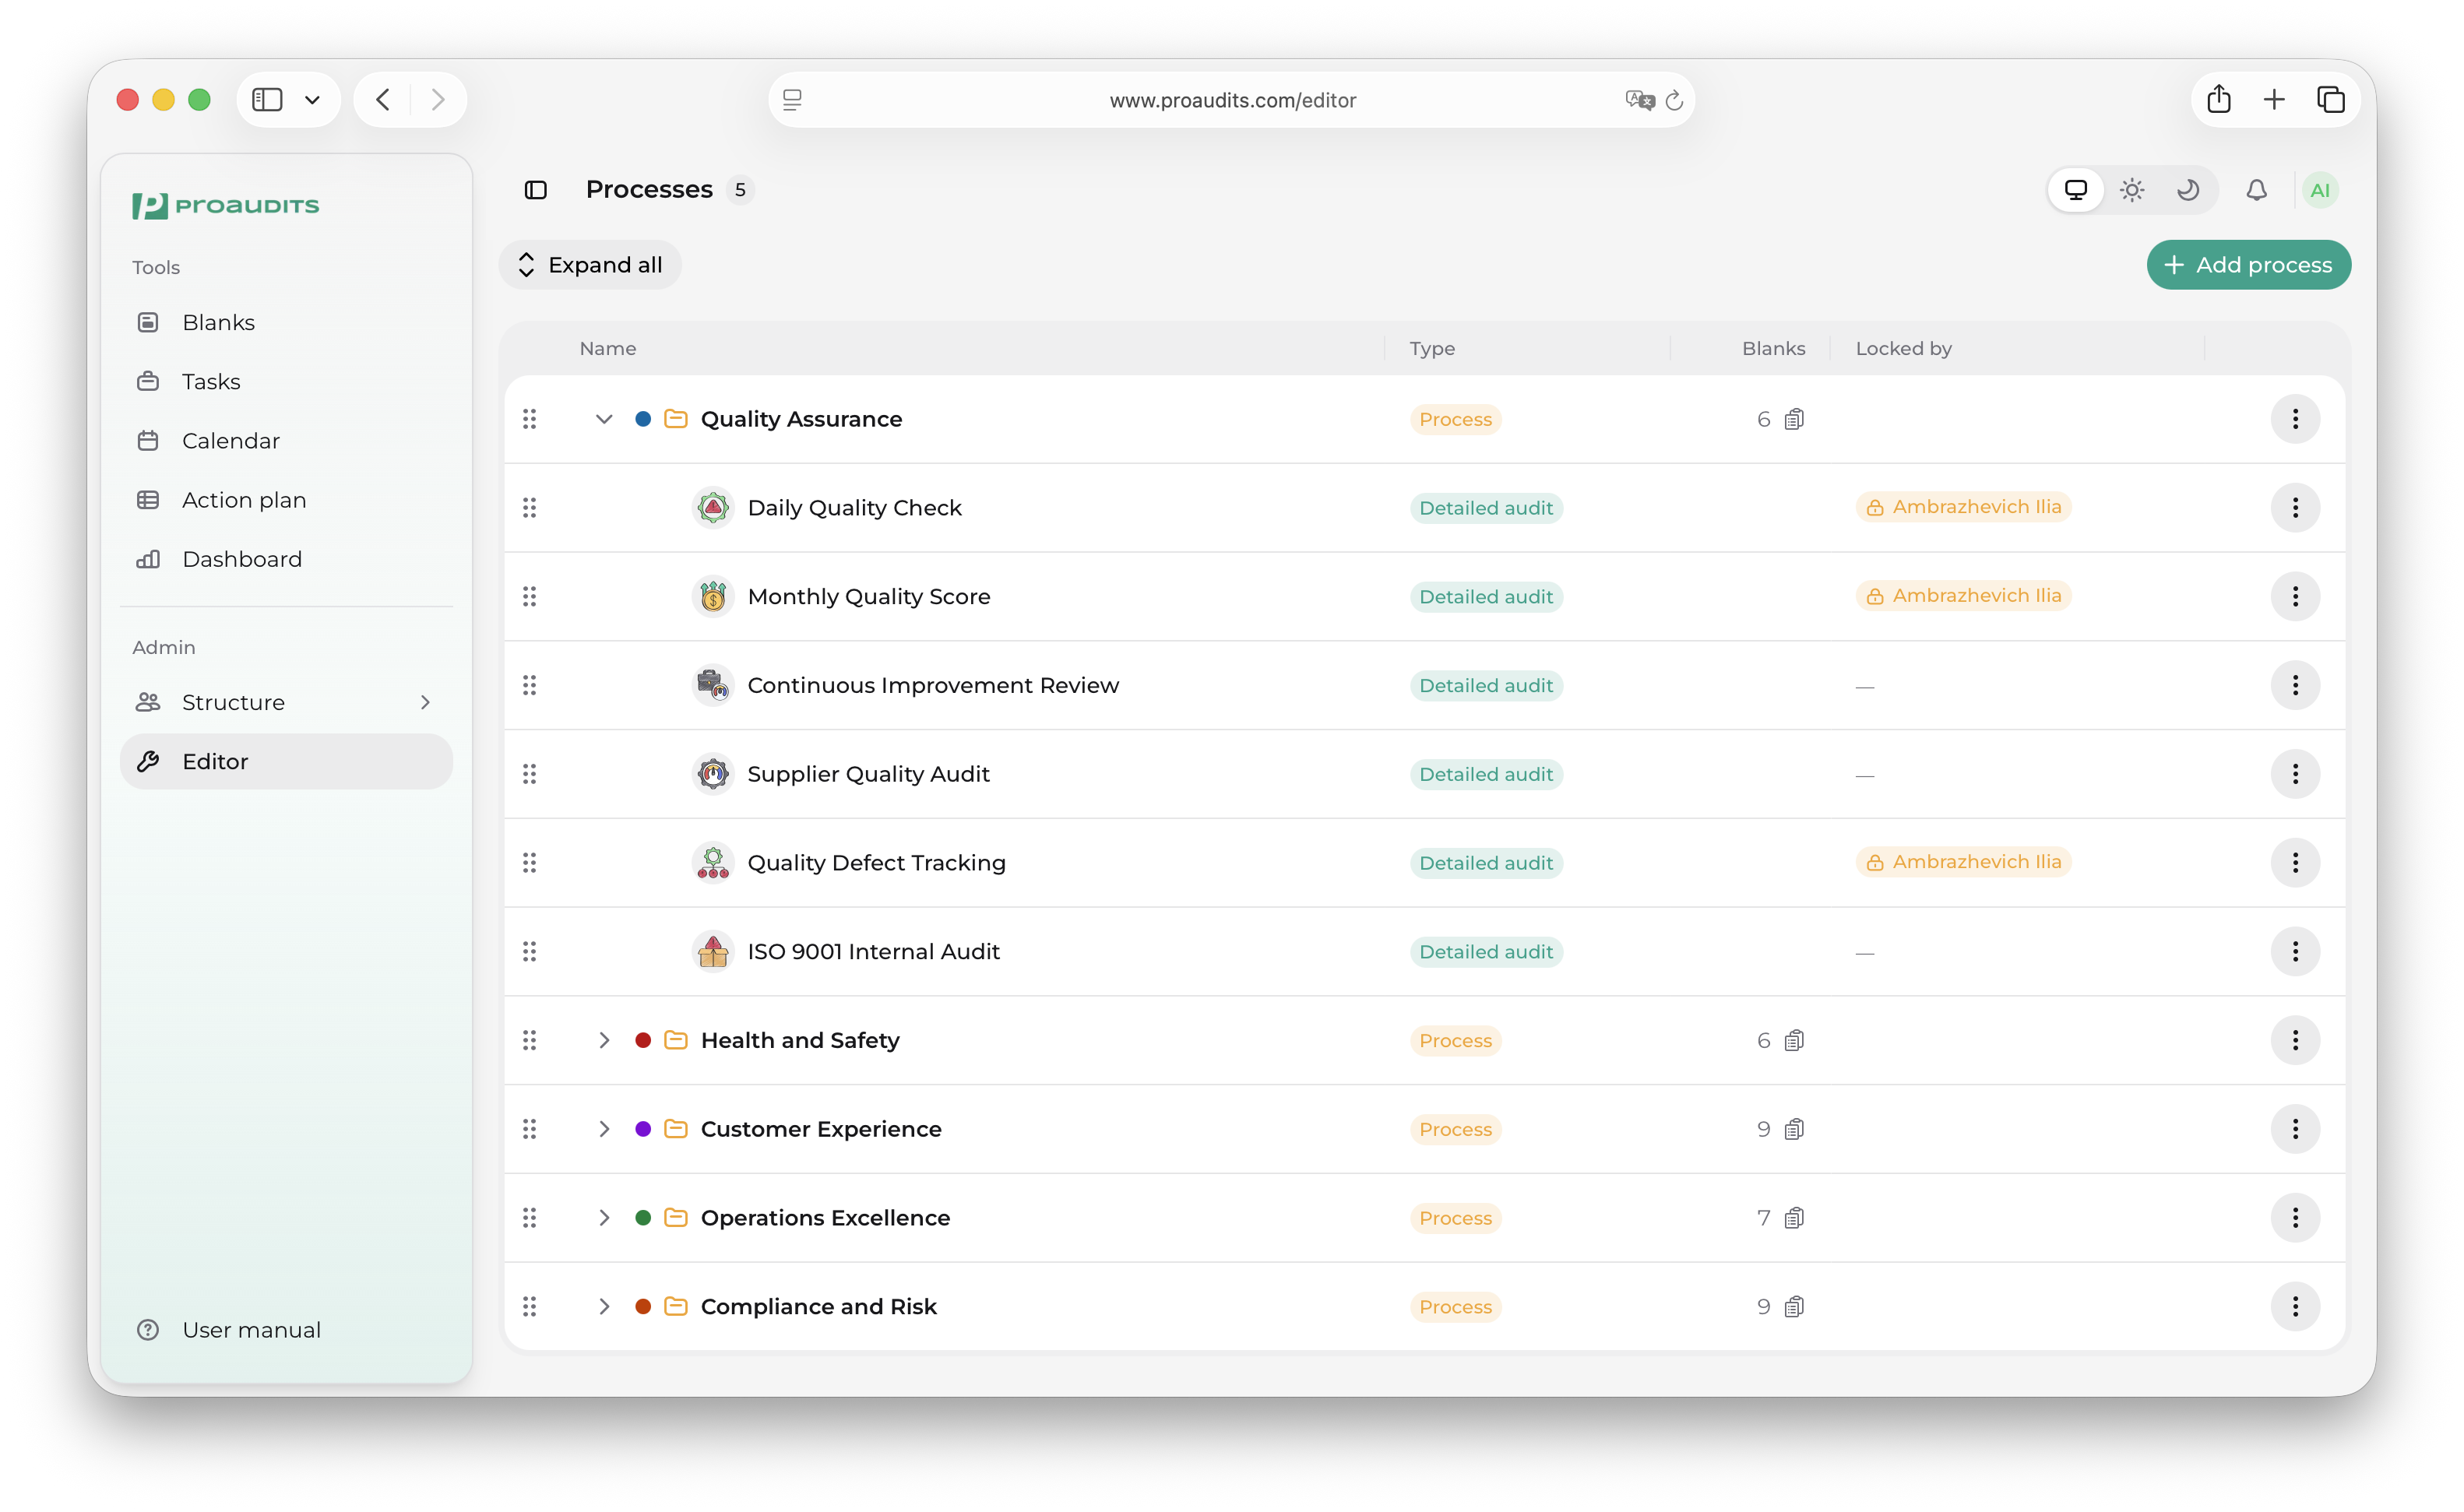
Lock / unlock a blank
ProAudits gives every blank a lock to prevent two designers from editing the same template at once.
- Lock — three-dot menu → Lock. The Locked-by column shows your name with a yellow chip.
- Unlock — same menu, now showing Unlock.
- Locked by someone else — both actions are greyed out in the menu and the chip is red. Ask the person whose name is on the chip to release it, or have an admin override.
Lock chip
Move a blank between processes
Drag the blank row onto a different process. ProAudits accepts the drop and the blank changes parent — its color updates to the new process's color. You can also drop the blank between two specific blank rows in another process to control the position.
Reorder blanks inside a process
Drag a blank up or down between its siblings. The order shown here is the order auditors will see on the Blanks screen.
Delete a blank
Three-dot menu → Delete. Confirm the dialog. The blank is gone from the catalogue and can no longer be used to start audits. Audits already finished or in progress are not affected — they keep their copy of the structure they were started with.
The "Saving…" indicator
Most actions on this page save in the background — the grid updates immediately while the save happens. The small Saving… spinner next to Expand all lights up while one of those background saves is running, and disappears when everything is committed. If something fails, the action reverts and a toast tells you what went wrong.
What goes where — quick map
| If you want to… | Do it here |
|---|---|
| Create / rename / color / delete a process | This page — top-level actions |
| Create / move / rename / lock / delete a blank | This page — child-row actions |
| Edit the content of a blank (sections, items, weights) | Editor — blank content |
| Decide who can run a blank (roles, structure units) | Editor — blank content → Settings panel |
| Schedule a blank to run automatically | Editor — blank content → Routines |
Everything else about a single blank — sections, items, sub-items, weights, photo rules, the access lists, the routines — lives on the next page.